powershell美化
写在前面
除了安装命令,其他都是测试命令,后续再写进配置文件
安装主题控件
安装主题oh-my-posh,powershell中执行
winget install JanDeDobbeleer.OhMyPosh -s winget
oh-my-posh init pwsh | Invoke-Expression # 查看效果,这里可能不能显示符号点击加号旁边进入设置,左边点击powershell,向下滑点击外观,将字体改成nerd类型的字体,也能到Nerd Fonts - Iconic font aggregator, glyphs/icons collection, & fonts patcher下载字体
也能直接改默认
Get-PoshThemes # 查看主题
# 选择并应用一个主题
oh-my-posh init pwsh --config "$env:POSH_THEMES_PATH\theme.json" | Invoke-Expression
# 将 $env:POSH_THEMES_PATH\theme.json 替换为实际的主题文件路径,运行$env:POSH_THEMES_PATH可以看到主题的绝对路径
powershell模块管理基础命令
1. 安装模块
使用 Install-Module 命令从 PowerShell Gallery 安装模块:
Install-Module -Name ModuleName -Force2. 导入模块
使用 Import-Module 命令加载模块,使其命令可用:
Import-Module -Name ModuleName3. 查看已安装模块
使用 Get-Module 查看当前会话中已加载的模块,或者使用 -ListAvailable 参数查看系统上所有已安装的模块:
# 查看当前会话中已加载的模块
Get-Module

# 查看系统上所有已安装的模块
Get-Module -ListAvailable
4. 获取模块命令
使用 Get-Command 查看某个模块中的所有命令:
Get-Command -Module ModuleName5. 查看模块信息
使用 Get-Module 查看模块的详细信息:
Get-Module -Name ModuleName6. 更新模块
使用 Update-Module 更新已安装的模块:
Update-Module -Name ModuleName7. 卸载模块
使用 Remove-Module 卸载模块,从当前会话中移除:
Remove-Module -Name ModuleName8. 查找模块
使用 Find-Module 从 PowerShell Gallery 查找模块:
Find-Module -Name ModuleName9. 保存模块
使用 Save-Module 将模块保存到本地文件夹,而不是直接安装:
Save-Module -Name ModuleName -Path C:\Path\To\Save10. 发布模块
使用 Publish-Module 将模块发布到 PowerShell Gallery(需要先进行配置和认证):
Publish-Module -Name ModuleName -NuGetApiKey 'YourApiKey'示例:安装和使用 PSReadLine 模块
下面是一个完整的示例,展示了如何安装、导入和使用 PSReadLine 模块:
# 安装 PSReadLine 模块
Install-Module -Name PSReadLine -Force

# 导入 PSReadLine 模块
Import-Module -Name PSReadLine

# 查看 PSReadLine 模块中的命令
Get-Command -Module PSReadLine

# 设置 PSReadLine 选项(例如,设置语法高亮颜色)
Set-PSReadLineOption -PredictionSource History

# 卸载 PSReadLine 模块(从当前会话中移除)
Remove-Module -Name PSReadLine
安装插件(可选)
首先设置PSGallery为受信任存储库
要将PSGallery设置为受信任的存储库,可以运行以下命令:
Set-PSRepository -Name 'PSGallery' -InstallationPolicy TrustePSReadLine
Install-Module -Name PSReadLine -Scope CurrentUser -Force -SkipPublisherCheck我的配置附上
Import-Module PSReadLine
# 设置 PSReadLine 的编辑模式为 Emacs 风格
# 禁用提示音
# 设置历史预测源为命令历史
# 设置预测视图样式为列表视图
# 启用工具提示功能
# 防止保存历史记录中的重复命令
Set-PSReadLineOption -EditMode Emacs `
                     -BellStyle None `
                     -PredictionSource History `
                     -PredictionViewStyle ListView `
                     -ShowToolTips `
                     -HistoryNoDuplicates `
                     -Colors @{ # 设置不同元素的颜色,如命令、参数、运算符、变量、字符串、数字、成员、类型、和默认颜色
                         Command = 'Cyan'
                         Parameter = 'Yellow'
                         Operator = 'Red'
                         Variable = 'Green'
                         String = 'Magenta'
                         Number = 'White'
                         Member = 'DarkYellow'
                         Type = 'DarkCyan'
                         Default = 'Gray'
                     }


# 增量搜索,你在键入时会动态显示匹配项
Set-PSReadLineKeyHandler -Chord Ctrl+R -Function ReverseSearchHistory
# 逐步搜索,每按一次快捷键会找到下一个匹配项
#Set-PSReadLineKeyHandler -Chord 'Ctrl+r' -Function HistorySearchBackward

# Shows navigable menu of all options when hitting Tab
Set-PSReadLineKeyHandler -Key Tab -Function Complete
#Set-PSReadlineKeyHandler -Key Tab -Function MenuComplete
z
Install-Module -Name Z -Scope CurrentUser -Force -SkipPublisherCheck # 安装安装完成后,使用以下命令导入 z 模块:
Import-Module Z使用 Z 模块
切换到目录
使用 z 命令加上目录的部分名称,可以快速切换到该目录:
z foldername例如,假设你经常访问名为 Projects 的目录,你可以通过以下命令快速跳转到该目录:
z projects显示目录历史
使用 -l 参数列出所有之前访问过的目录历史:
z -lposh-git
Install-Module posh-git -Scope CurrentUser -Force # 安装
Import-Module posh-git # 导入
该模块管理和监视 Git 仓库的状态,进入git目录就能看到
PSFzf
提供了在命令行中进行快速模糊搜索和选择的功能
Set-PsFzfOption -PSReadLineChordProvider 'Ctrl+f' -PSReadLineChordReverseHistory 'Ctrl+r'Set-PsFzfOption 命令用于配置 PSFzf 模块的选项,以定制键绑定和其他行为,将 Ctrl+f 设置为启动模糊搜索,Ctrl+r 设置为反向搜索历史记录的功能,使用这个可以不用上面那个,或者换个快捷键
添加别名
Set-Alias ll ls
Set-Alias g git
Set-Alias grep findstr
我的部分别名
设置环境变量
$env:http_proxy="http://127.0.0.1:10809"
$env:puser = "C:\Users\xxx\Documents\PowerShell\Microsoft.PowerShell_profile.ps1"上面的用处是在命令行执行$env:http_proxy就可以改变powershell的代理端口,执行cat $env:puser可以查看powershell的配置文件
加入配置文件
执行$PROFILE可以得到配置文件目录,可以按目录创建文件,编辑文件,我的部分代码如下
# Oh My Posh configuration
oh-my-posh init pwsh --config "C:\Users\xxx\AppData\Local\Programs\oh-my-posh\themes\night-owl.omp.json" | Invoke-Expression

# Import other modules
Import-Module z
Import-Module posh-git
#Icons
Import-Module Terminal-Icons

# PSReadLine options
Import-Module PSReadLine
# 设置 PSReadLine 的编辑模式为 Emacs 风格
# 禁用提示音
# 设置历史预测源为命令历史
# 设置预测视图样式为列表视图
# 启用工具提示功能
# 防止保存历史记录中的重复命令
Set-PSReadLineOption -EditMode Emacs `
                     -BellStyle None `
                     -PredictionSource History `
                     -PredictionViewStyle ListView `
                     -ShowToolTips `
                     -HistoryNoDuplicates `
                     -Colors @{ # 设置不同元素的颜色,如命令、参数、运算符、变量、字符串、数字、成员、类型、函数和默认颜色
                         Command = 'Cyan'
                         Parameter = 'Yellow'
                         Operator = 'Red'
                         Variable = 'Green'
                         String = 'Magenta'
                         Number = 'White'
                         Member = 'DarkYellow'
                         Type = 'DarkCyan'
#                         Function = 'Blue'
                         Default = 'Gray'
                     }

# 增量搜索,你在键入时会动态显示匹配项
#Set-PSReadLineKeyHandler -Chord Ctrl+R -Function ReverseSearchHistory
# 逐步搜索,每按一次快捷键会找到下一个匹配项#
#Set-PSReadLineKeyHandler -Chord 'Ctrl+r' -Function HistorySearchBackward

# Shows navigable menu of all options when hitting Tab
Set-PSReadLineKeyHandler -Key Tab -Function Complete
#Set-PSReadlineKeyHandler -Key Tab -Function MenuComplete

#Utilities
function which ($command) {
	Get-Command -Name $command -ErrorAction SilentlyContinue |
	 Select-Object -ExpandProperty Path -ErrorAction SilentlyContinue
}

#Fzf
Import-Module PSFzf
Set-PsFzfOption -PSReadLineChordProvider 'Ctrl+f' -PSReadLineChordReverseHistory 'Ctrl+r'

# Alias
Set-Alias ll ls
Set-Alias g git
Set-Alias grep findstr

#env
$env:http_proxy="http://127.0.0.1:10809" #启动改变代理
$env:puser = "C:\Users\xxx\Documents\PowerShell\Microsoft.PowerShell_profile.ps1"
其中which函数实现了linux上的函数功能,其他的前面有讲,保存,启动powershell
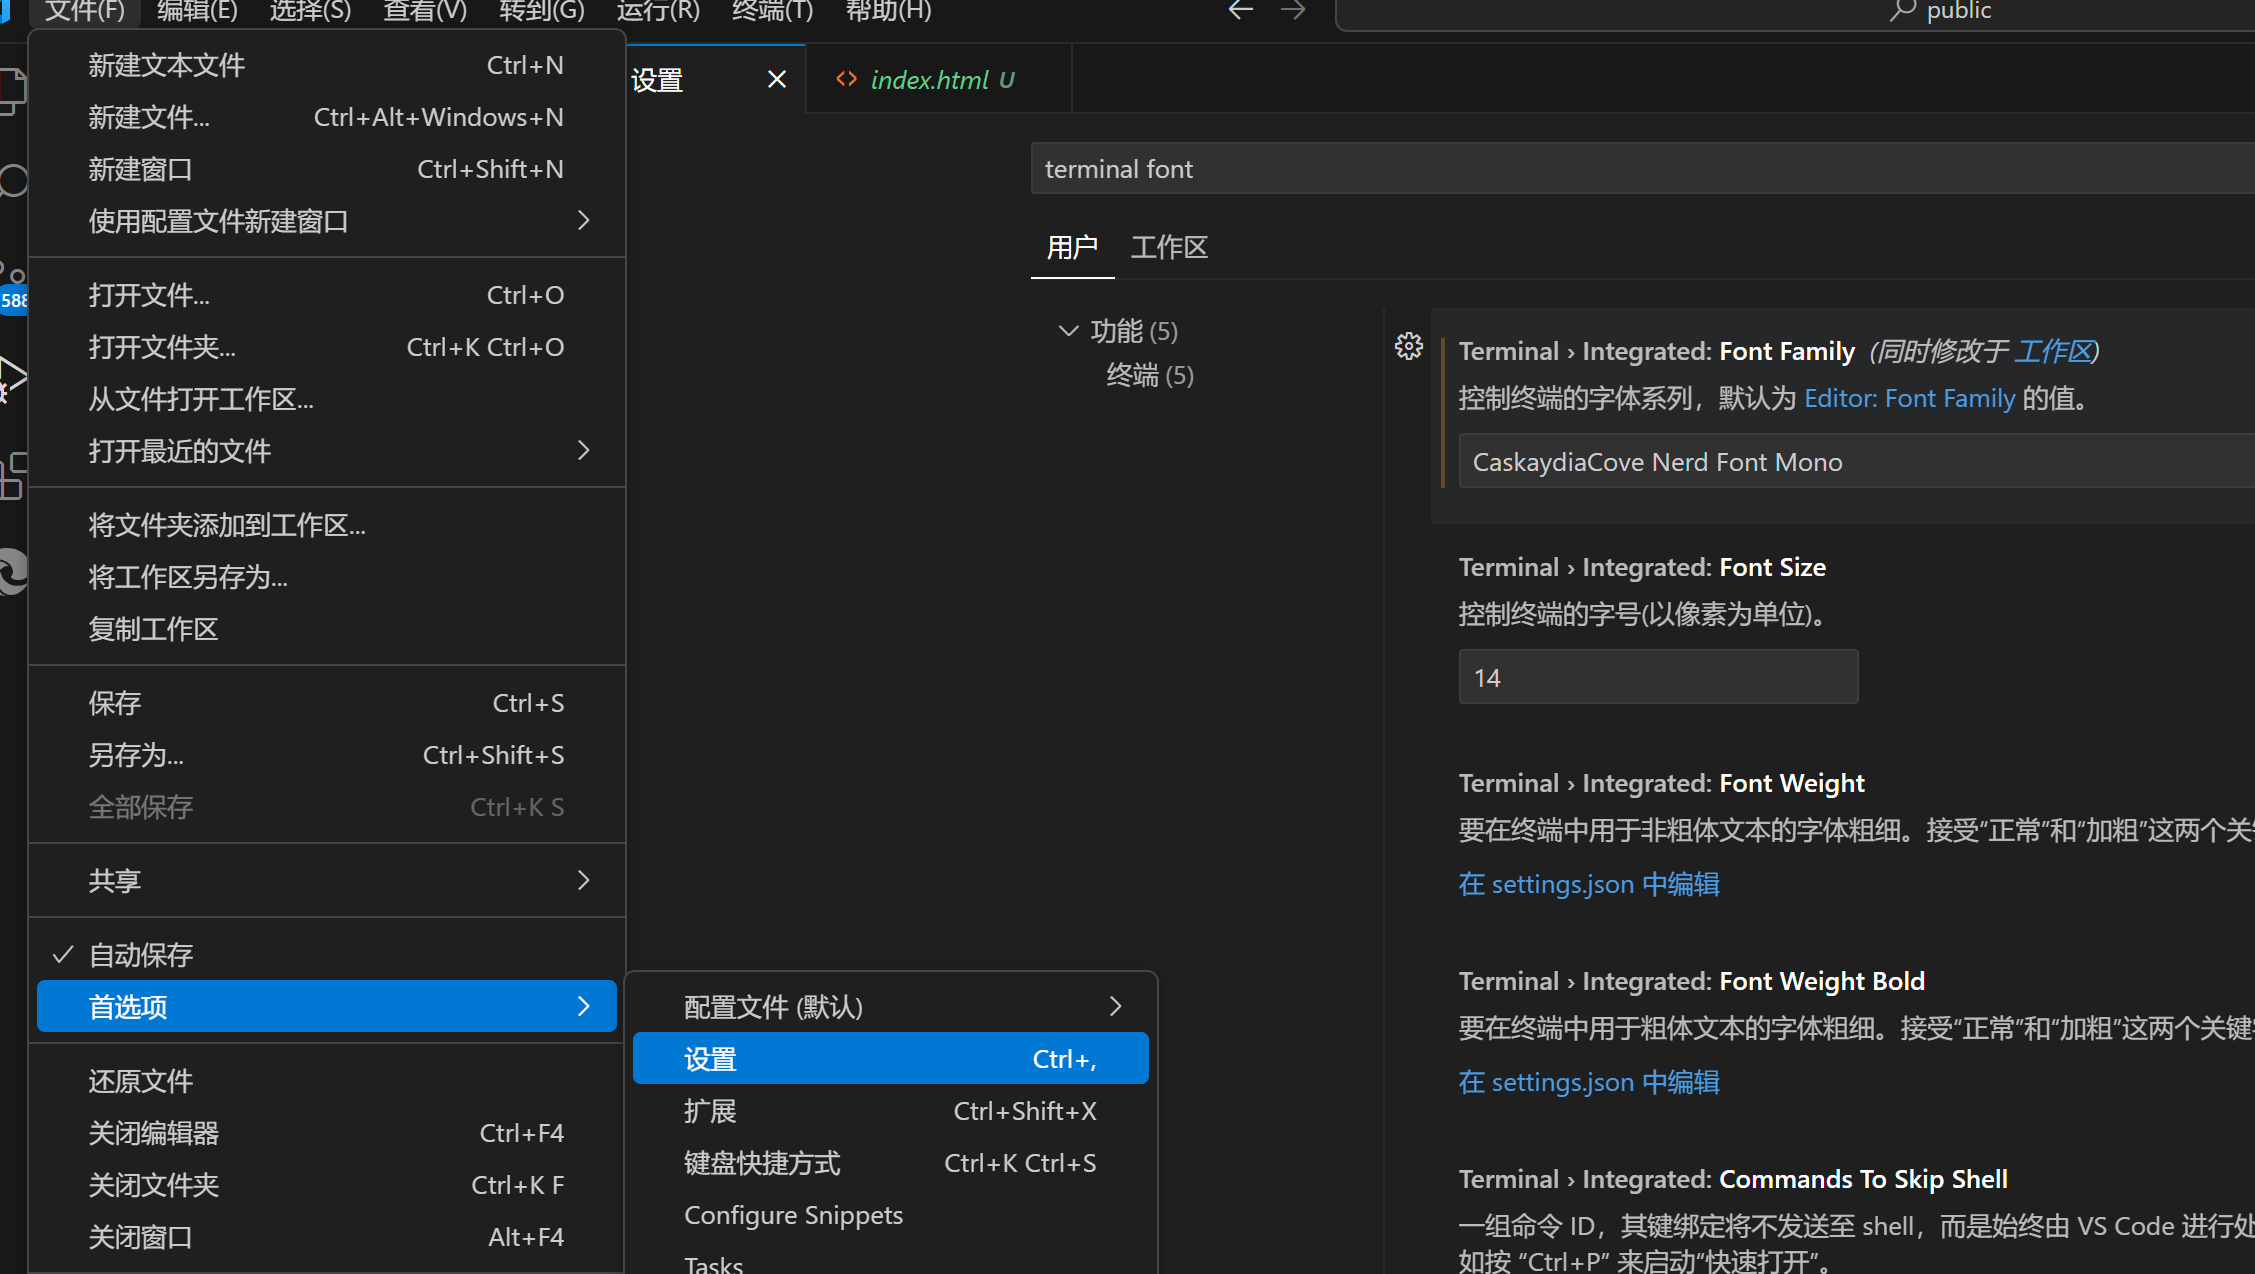
vscode图标不显示
更改字体为CaskaydiaCove Nerd Font Mono,改成可显示就行,右上角文件->首选项->设置,搜索terminal font,两个都改了吧
读取主题报错
报错
&: The term 'C:\Users\閫愭ⅵ\AppData\Local\oh-my-posh\init.26.4.1.default.5410.ps1' is not recognized as a name of a cmdlet, function, script file, or executable program.
Check the spelling of the name, or if a path was included, verify that the path is correct and try again.
解决方法
中文编码出错,在powershell命令加入以下命令,或者永久加入前面提到的配置文件中
$OutputEncoding = [System.Console]::OutputEncoding = [System.Console]::InputEncoding = [System.Text.Encoding]::UTF8